
How to embroider on crochet
If an amigurumi piece has embroidered details, it’s usually the very last step. These tutorials walk you through a few common details you might want to embroider onto your amigurumi to either give them a little bit more pizzaz or, in the case of embroidered eyes, make them safe for kids and pets.
HOW TO EMBROIDER AMIGURUMI EYES (STEP-BY-STEP WITH PHOTOS)
Finish the piece that’ll be embroidered onto.
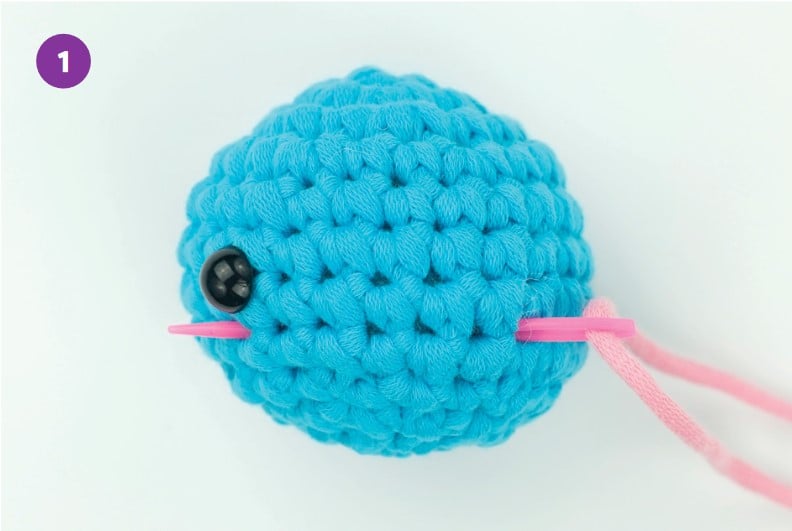
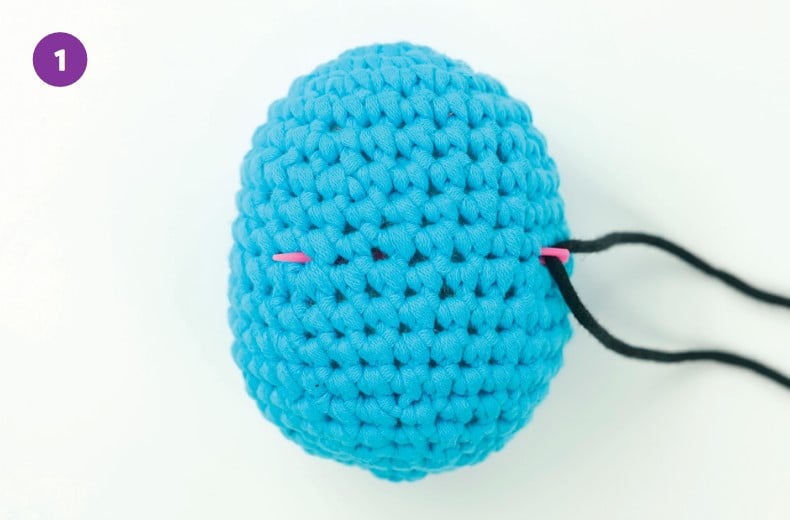
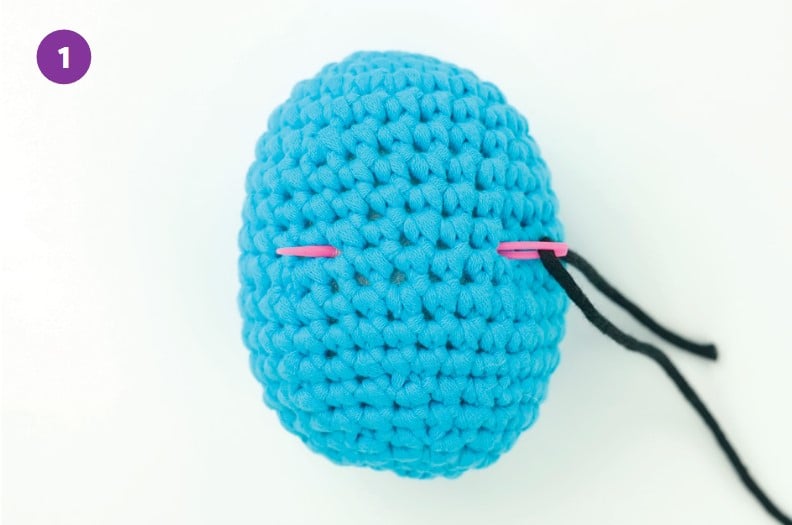 1. Thread a needle with an arm’s length of black yarn. Insert the needle somewhere on the right side of the amigurumi, and out where you want the bottom of the right eye to be. Leave a 6-inch yarn tail. 1. Thread a needle with an arm’s length of black yarn. Insert the needle somewhere on the right side of the amigurumi, and out where you want the bottom of the right eye to be. Leave a 6-inch yarn tail. |
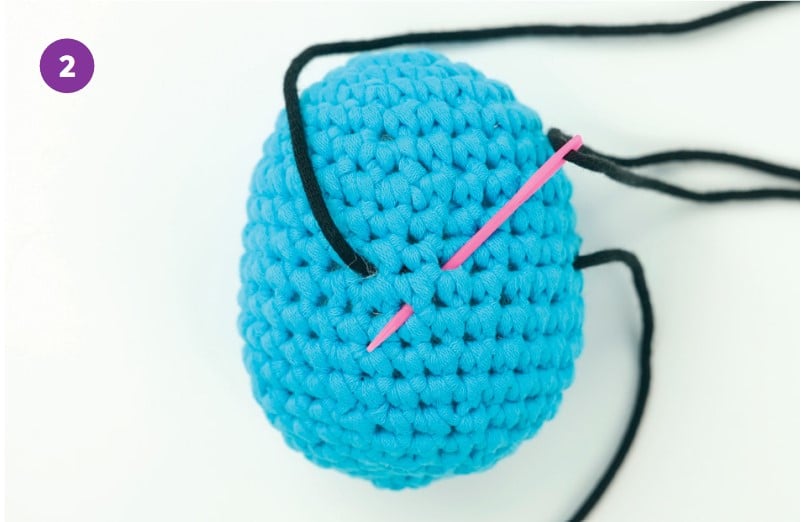
 2. Insert the needle one round up and pull it out the same bottom point of the right eye. 2. Insert the needle one round up and pull it out the same bottom point of the right eye. |
TIP
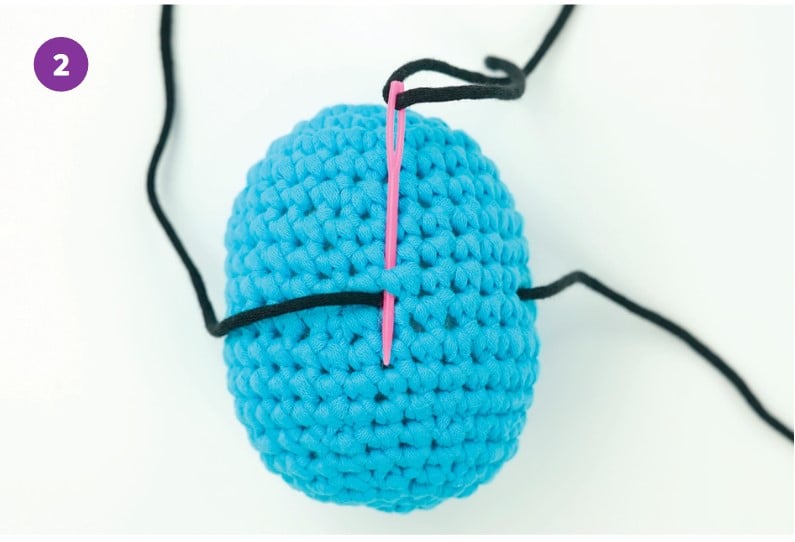
Be careful not to pull the yarn too tight, otherwise the stuffing might be visible above and below the eye.
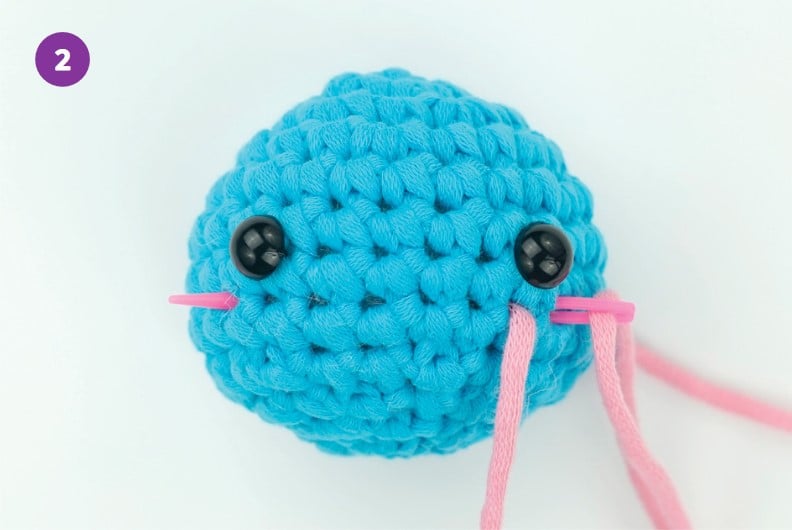
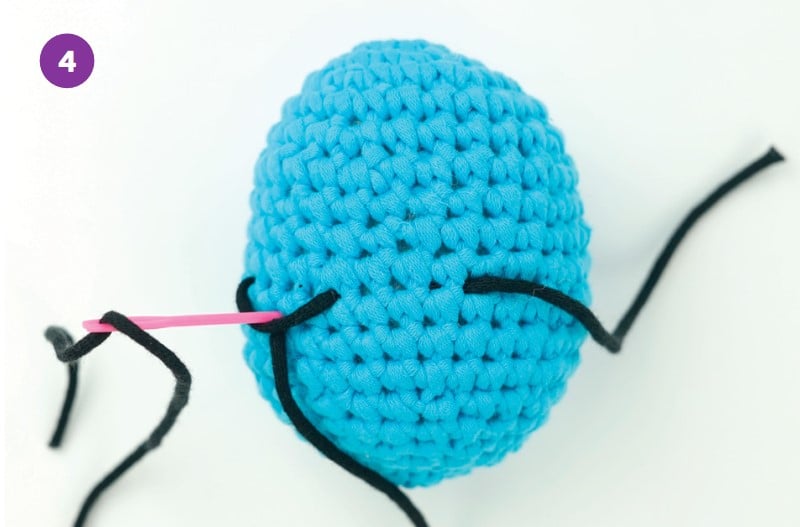
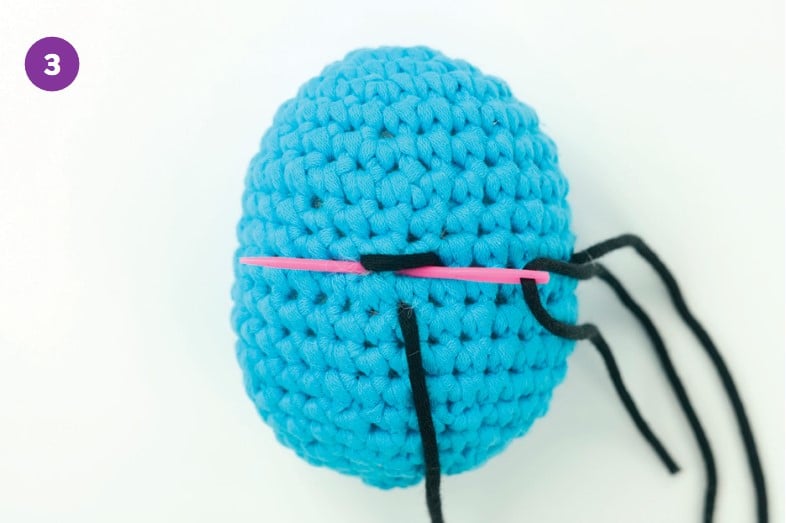
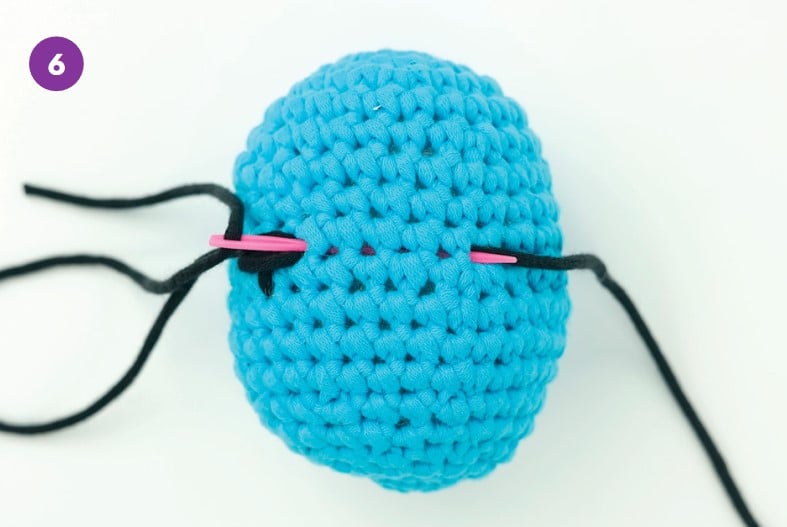
 3. Repeat step 3 until the eye is as big as you want, probably at least four times. To make the other eye, insert the needle into the top of the current eye, and pull it out where you want the bottom of the second eye to be. 3. Repeat step 3 until the eye is as big as you want, probably at least four times. To make the other eye, insert the needle into the top of the current eye, and pull it out where you want the bottom of the second eye to be. |
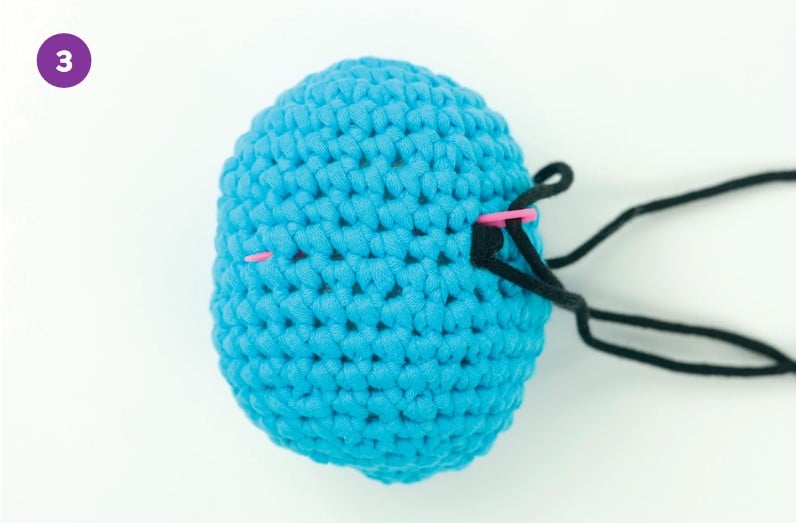
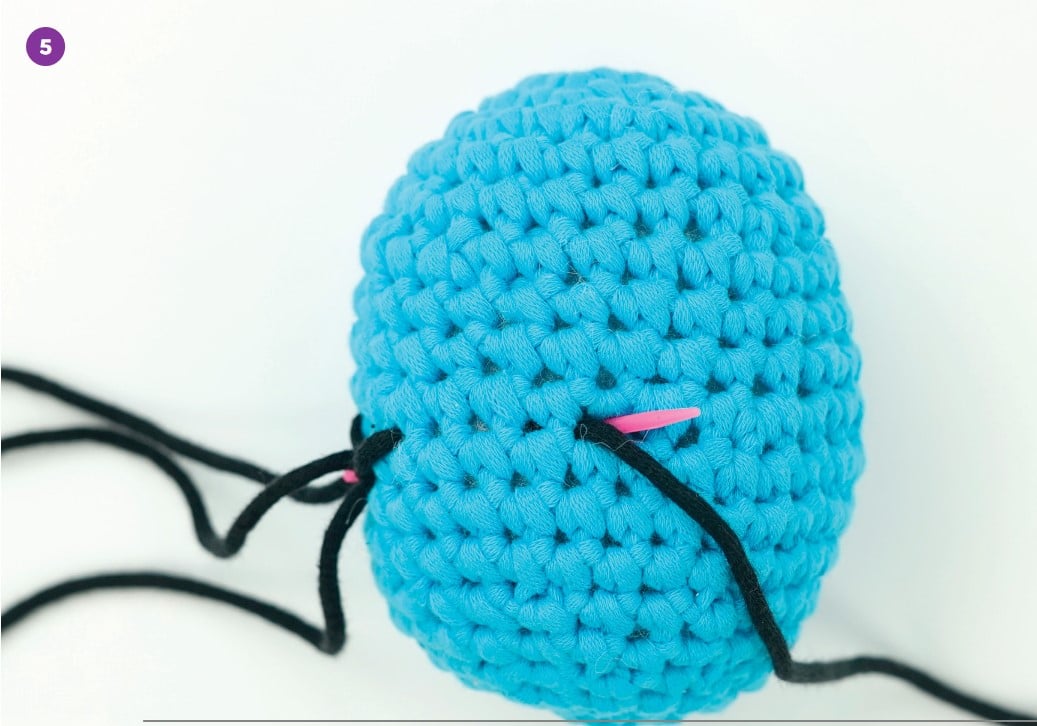
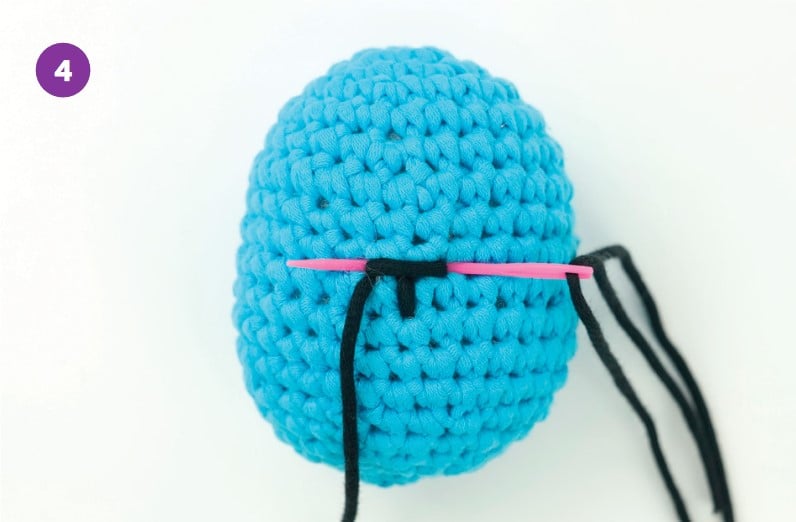
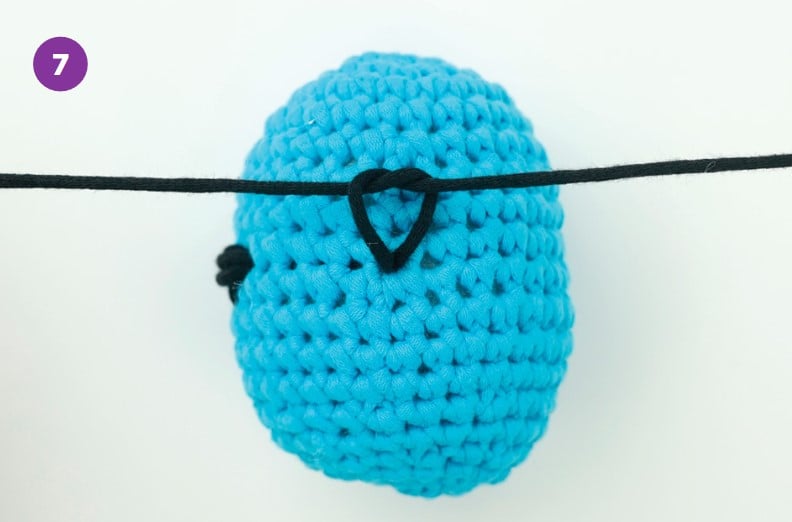
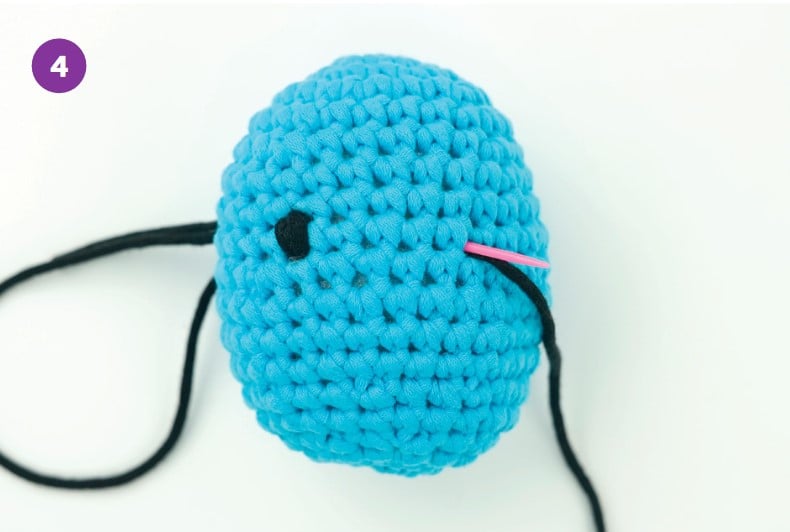 4. Repeat step 3 until the eye is as big as you want. To finish, insert the needle into the top of the current eye and pull it out from the same hole it originally went in, so that both yarn tails are coming out of the same hole. 4. Repeat step 3 until the eye is as big as you want. To finish, insert the needle into the top of the current eye and pull it out from the same hole it originally went in, so that both yarn tails are coming out of the same hole. |
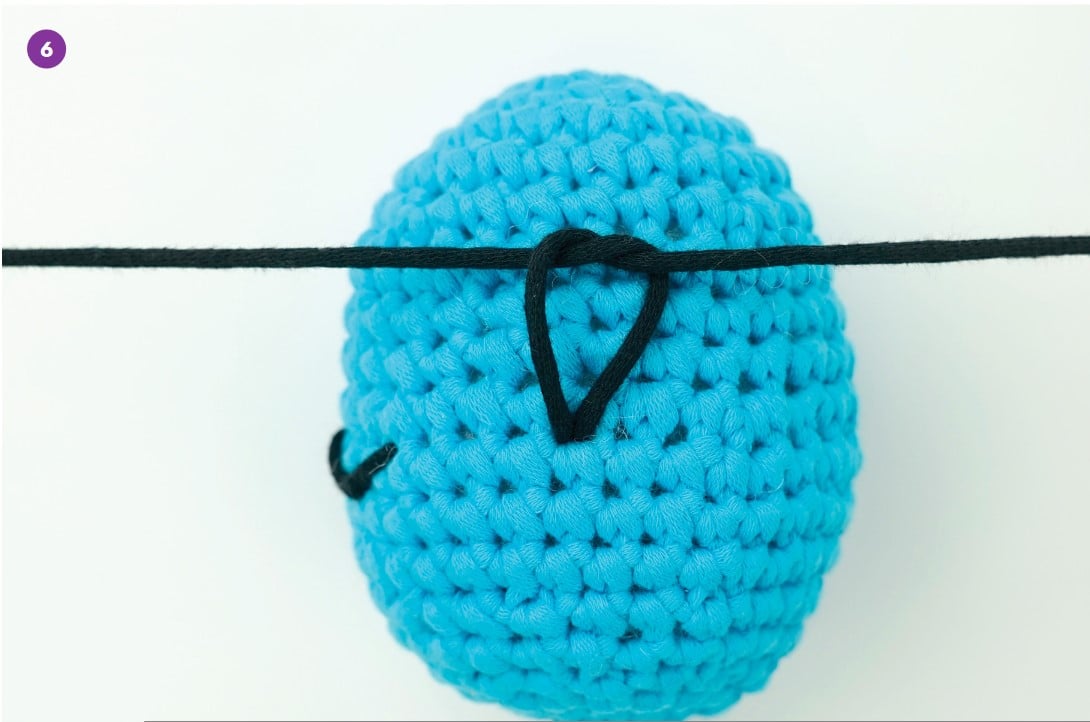
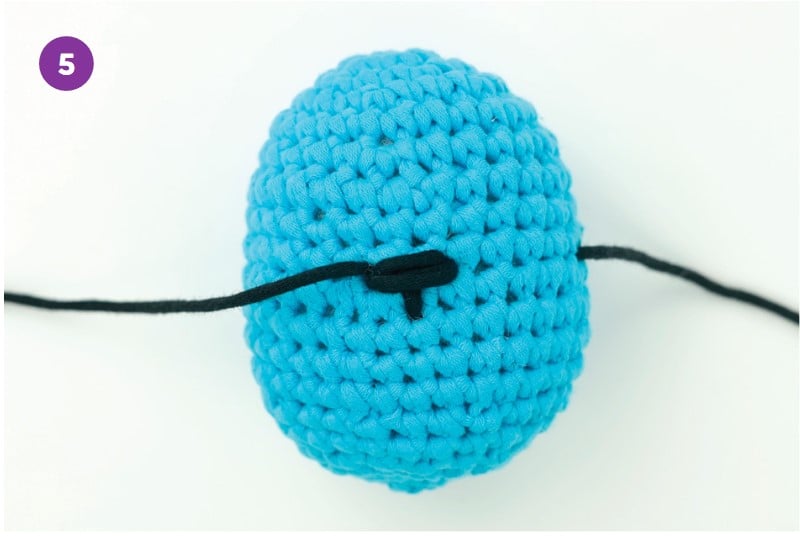
 5. Tie a knot with both yarn tails, as close to the surface of the piece as possible. Hide the yarn tails in the piece. 5. Tie a knot with both yarn tails, as close to the surface of the piece as possible. Hide the yarn tails in the piece. |
HOW TO EMBROIDER BLUSH (STEP-BY-STEP WITH PHOTOS)
Finish the piece that’ll be embroidered onto.
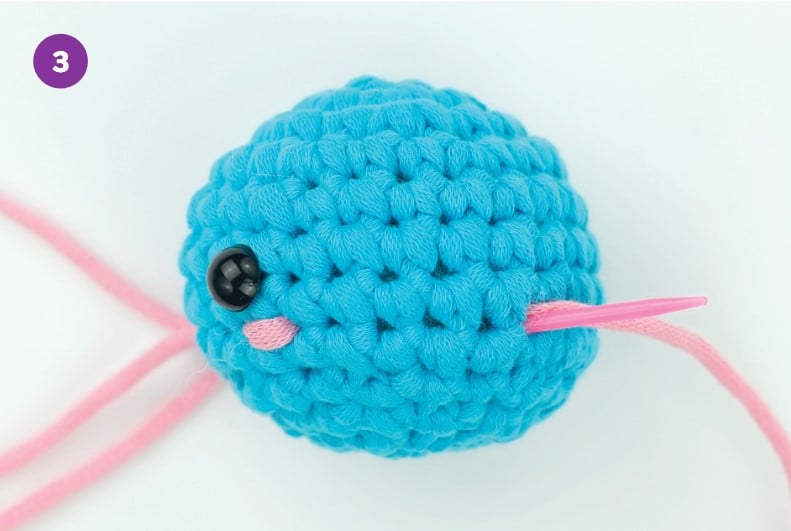
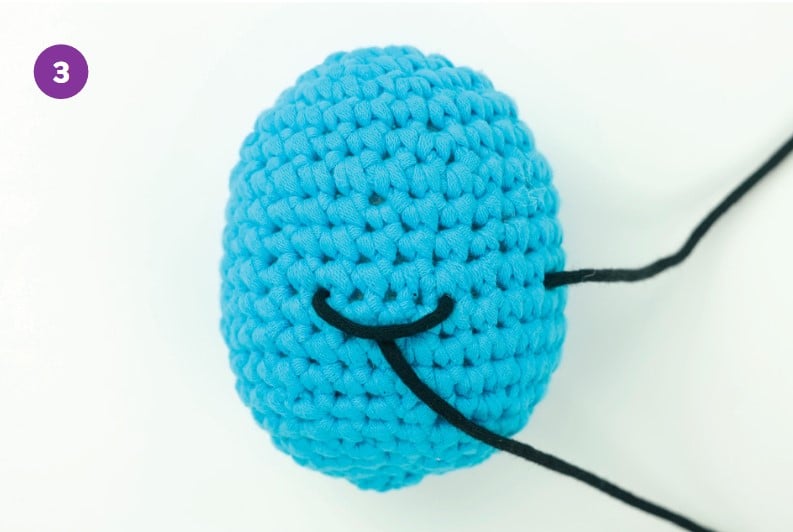
 1. Thread a needle with an arm’s length of pink yarn. Insert the needle somewhere on the right side of the amigurumi, and out under the left side of the right eye. Leave a 6-inch yarn tail. 1. Thread a needle with an arm’s length of pink yarn. Insert the needle somewhere on the right side of the amigurumi, and out under the left side of the right eye. Leave a 6-inch yarn tail. |
 2. Insert the needle one stitch to the right, and out under the left side of the left eye. 2. Insert the needle one stitch to the right, and out under the left side of the left eye. |
TIP
Be careful not pull the yarn too tight, otherwise the stuffing might be visible around the blush.
 3. Insert the needle one stitch to the right and pull it out the same hole where it originally went in, so that both yarn tails are coming out of the same hole. 3. Insert the needle one stitch to the right and pull it out the same hole where it originally went in, so that both yarn tails are coming out of the same hole. |
 4. Tie a knot with both yarn tails, as close to the surface of the piece as possible. Hide the yarn tails in the piece. 4. Tie a knot with both yarn tails, as close to the surface of the piece as possible. Hide the yarn tails in the piece. |
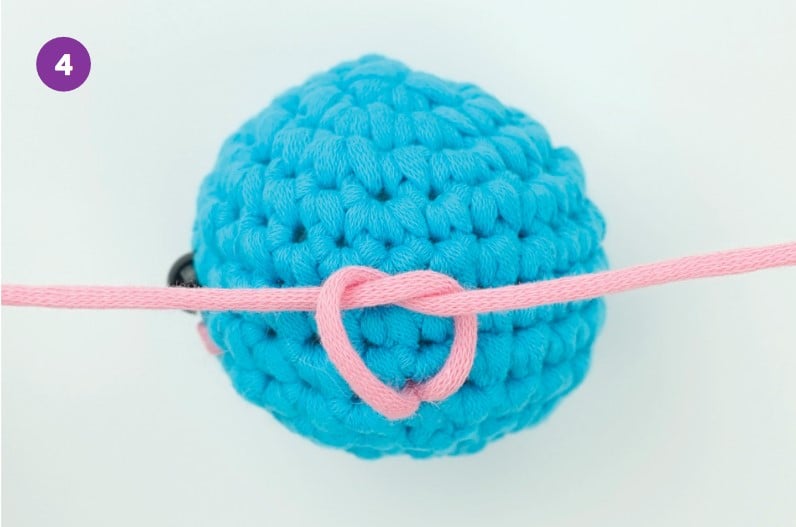
HOW TO EMBROIDER A CURVE (STEP-BY-STEP WITH PHOTOS)
Finish the piece that’ll be embroidered onto.
 1. Thread a needle with an arm’s length of black yarn. Insert the needle somewhere on the right side of the amigurumi, and out where you want 1. Thread a needle with an arm’s length of black yarn. Insert the needle somewhere on the right side of the amigurumi, and out where you wantthe right end of the curve to be. Leave a 6-inch yarn tail. |
 2. Insert the needle where you want the left side of the curve to be, and out where you want the bottom of the curve to be. 2. Insert the needle where you want the left side of the curve to be, and out where you want the bottom of the curve to be. |
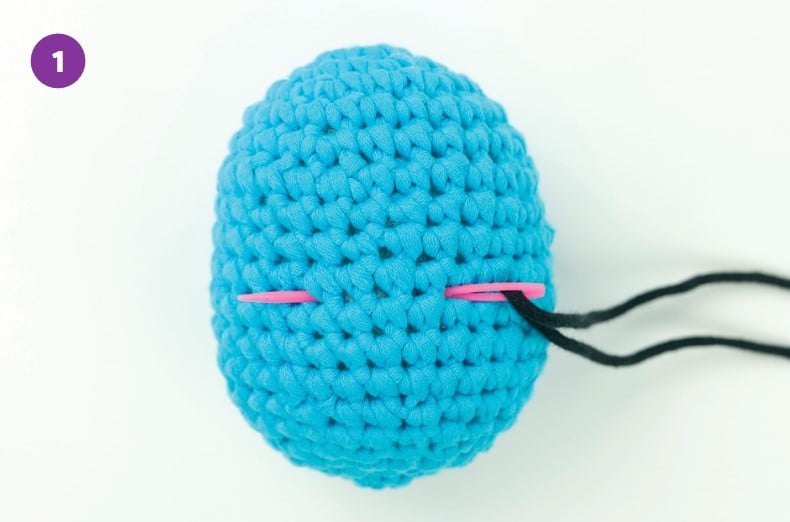
 3. Pull the yarn just tight enough so that the curve looks like how you want it. 3. Pull the yarn just tight enough so that the curve looks like how you want it. |
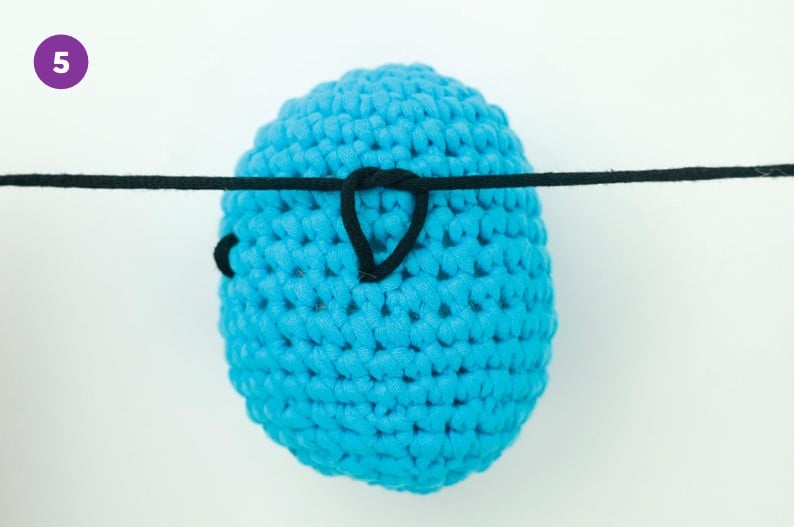
 4. Make sure the needle and yarn came out below the curve. Then bring the needle up and over the curve, and insert the needle in the same hole it just came out of. Pull tight to secure the curve. 4. Make sure the needle and yarn came out below the curve. Then bring the needle up and over the curve, and insert the needle in the same hole it just came out of. Pull tight to secure the curve. |
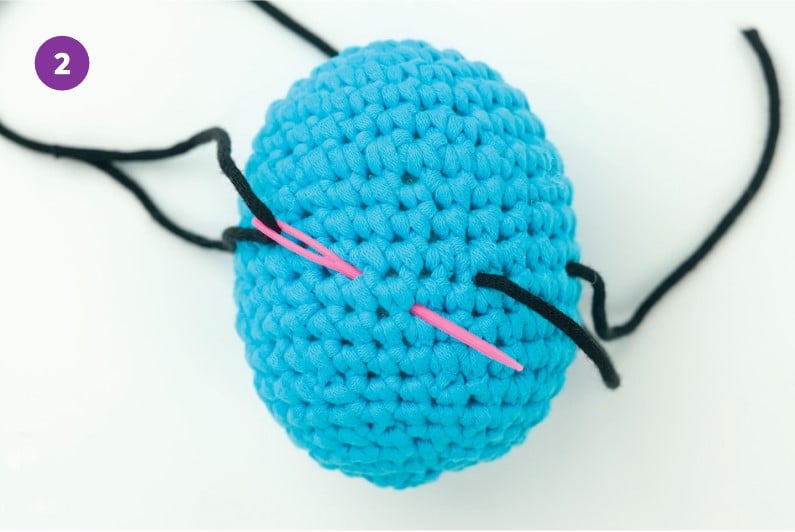
 5. Pull the needle out of the same hole in the piece it originally went into, so that both yarn tails are coming out of the same hole. 5. Pull the needle out of the same hole in the piece it originally went into, so that both yarn tails are coming out of the same hole. |
 6. Tie a knot with both yarn tails, as close to the surface of the piece as possible. Hide the yarn tails in the piece. 6. Tie a knot with both yarn tails, as close to the surface of the piece as possible. Hide the yarn tails in the piece. |
HOW TO EMBROIDER A NOSE AND MOUTH (STEP-BY-STEP WITH PHOTOS)
Finish the piece that’ll be embroidered onto.
 1. Thread a needle with an arm’s length of black yarn. Insert the needle somewhere on the right side of the amigurumi, and out where you want the left side of the nose to be. Leave a 6-inch yarn tail. 1. Thread a needle with an arm’s length of black yarn. Insert the needle somewhere on the right side of the amigurumi, and out where you want the left side of the nose to be. Leave a 6-inch yarn tail. |
 2. Insert the needle where you want the right side of the nose to be, and out below the nose, centered between the left and right sides of the nose. 2. Insert the needle where you want the right side of the nose to be, and out below the nose, centered between the left and right sides of the nose. |
 3. Insert the needle between the left and right points of the nose. Pull it out on the left side of the nose. 3. Insert the needle between the left and right points of the nose. Pull it out on the left side of the nose. |
 4. Insert the needle in the right side of the nose, and out the left side of the nose. 4. Insert the needle in the right side of the nose, and out the left side of the nose. |
 5. Repeat step 5 until the nose is as big as you want, probably at least 4 times. 5. Repeat step 5 until the nose is as big as you want, probably at least 4 times. |
 6. Insert the needle in the right side of the nose and pull it out the same hole in the piece it originally went into, so that both yarn tails are coming 6. Insert the needle in the right side of the nose and pull it out the same hole in the piece it originally went into, so that both yarn tails are comingout of the same hole. |
 7. Tie a knot with both yarn tails, as close to the surface of the piece as possible. Hide the yarn tails in the piece. 7. Tie a knot with both yarn tails, as close to the surface of the piece as possible. Hide the yarn tails in the piece. |
Related Posts

How to slip stitch join in crochet
If you've ever wondered how to seamlessly join rounds and seam pieces together, then you're in the right place. In this tutorial, we're going...
Sep 30 2024

Whip stitch in crochet
The whip stitch is an essential crochet technique that is used to join two pieces of fabric together. It's also sometimes called an overcast...
Sep 30 2024

How to sew amigurumi parts together
Almost all amigurumi require pieces to be put together, whether that’s an arm to a body or a beak to head. The method below explains how...
Sep 30 2024

How to Sew a flat piece onto a round piece in crochet
Crochet is a wonderfully versatile craft that allows you to create a wide range of items, from cozy blankets to stylish hats and everything...
Sep 30 2024

How to finish an open edge with the invisible fasten off
For amigurumi pieces that'll be sewn onto another piece but with the edge still visible, there’s a slightly smoother way to finish the piece. Like the...
Sep 30 2024

How to fasten off in crochet
Finishing off a crochet project can be one of the most satisfying parts of the process. Knowing how to fasten off correctly is essential...
Sep 30 2024

How to use safety eyes
Safety eyes are plastic bulbs that help give some character and life to your amigurumi, crochet stuffed toys. Safety eyes are easy to attach but...
Sep 30 2024